
Uninstall VPN from Your iPhone Quickly
Did you know iPhone users are on their phones for about 4.8 hours every day? That’s a lot of time, showing how important a great iPhone experience is1. VPNs are handy for keeping your data safe. But, they can also lead to problems like bad internet connection or apps not working right1.
If you face internet troubles or want to save battery, removing the VPN from your iPhone might help1. This guide makes it easy to do just that, improving your iPhone’s performance.
Key Takeaways
- Spending a lot of time on iPhones makes a good user experience essential1.
- Reasons to get rid of a VPN include fixing connection problems and saving battery12.
- Deleting a VPN app doesn’t remove all VPN settings3.
- Knowing how to delete VPN from iPhone settings can save you time1.
- Follow this guide for easy VPN uninstallation steps1.
Why You Might Want to Uninstall a VPN
There are many reasons to uninstall a VPN from your iPhone. One key reason is to fix network issues. VPNs can slow down your internet, causing delays4. Free VPNs often lack good support, leading to more problems4.
You might also remove a VPN to use local services. Services like online banking or company networks might block VPNs5. This is important for solving internet problems tied to local networks.
Using free VPNs can risk your data being sold to advertisers4. This raises big privacy concerns. In contrast, paid VPNs like NordVPN provide more security and better service4.
Also, free VPNs may not work on all devices. But, paid options like NordVPN work well on many platforms, including iOS4. Pixel 8 users might already have a built-in VPN6.
Lastly, getting rid of a VPN can fix app glitches and connection issues5. Turning off or removing a VPN can lead to a smoother and faster connection. This makes your device more reliable5.
Understanding VPNs on iPhones
A Virtual Private Network (VPN) makes iPhones safe by creating a secret connection. It keeps your identity hidden on public Wi-Fi. This is very important for keeping your personal details safe from hackers. Though iPhones are safer than Androids, since more viruses attack Androids, using a VPN boosts your iPhone’s security by keeping what you do online private7.
Setting up a VPN on your iPhone is easy and quick. You just need to pick a provider from the App Store and sign up7. But, not all VPNs are the same. Free ones might use your data in ways you wouldn’t like, while paid ones offer better security but you have to pay7.
With a VPN, your iPhone sends data through servers around the globe. This hides where you really are7. So, you can watch shows or visit websites that usually aren’t available in your area. Plus, it stops companies from sending you ads based on your location7.
Always using a VPN on your iPhone is best for staying safe online. This is key when you’re doing things like banking or sharing private stuff7. iOS’s own security doesn’t cover internet traffic. Here, VPNs come in to keep your online data safe, making them super important for keeping your private life private7.
Signs You Need to Remove a VPN
Knowing when it’s time to delete your VPN is important. There are clear signs to look out for. These signs help you boost your iPhone’s performance and security.
Persistent Connectivity Issues
VPN connection troubles signal it may be time to uninstall the app. Issues include trouble connecting to the internet or Wi-Fi. You might also experience problems with iCloud backups and messaging apps like iMessage or FaceTime8.
Communication between devices might also worsen. This affects AirPlay and other Continuity functions8. Always update your device and check network settings for other problems8.
App Malfunctions
VPN app errors are a clear sign to think about its removal. These issues range from apps crashing to not working right. Users often face slower internet and lag, especially when gaming online9. Such troubles can hinder your device’s performance and negatively affect how you use it.
Security Concerns
Security is a huge worry with VPNs. The U.S. sees thousands of data breaches yearly9. If your VPN seems to be weakening your security, turn it off. It’s also vital to ensure your VPN is trustworthy and current for the best security.
How to Remove VPN from iPhone
Want to make your iPhone work better? Removing a VPN might help. You can get rid of a VPN by either uninstalling the app or deleting its profile from your settings. Both ways make sure the VPN is completely removed. This stops any issues caused by unwanted VPN setups.
Deleting the VPN App:
- Find the VPN app on your iPhone’s home screen.
- Press and hold the app icon until a menu pops up.
- Tap Remove App, then pick Delete App to confirm.
This action makes sure all files related to the VPN are gone from your phone.
“Getting rid of a VPN from your iPhone means first deleting the VPN app. Then, remove the VPN profile in Settings10.”
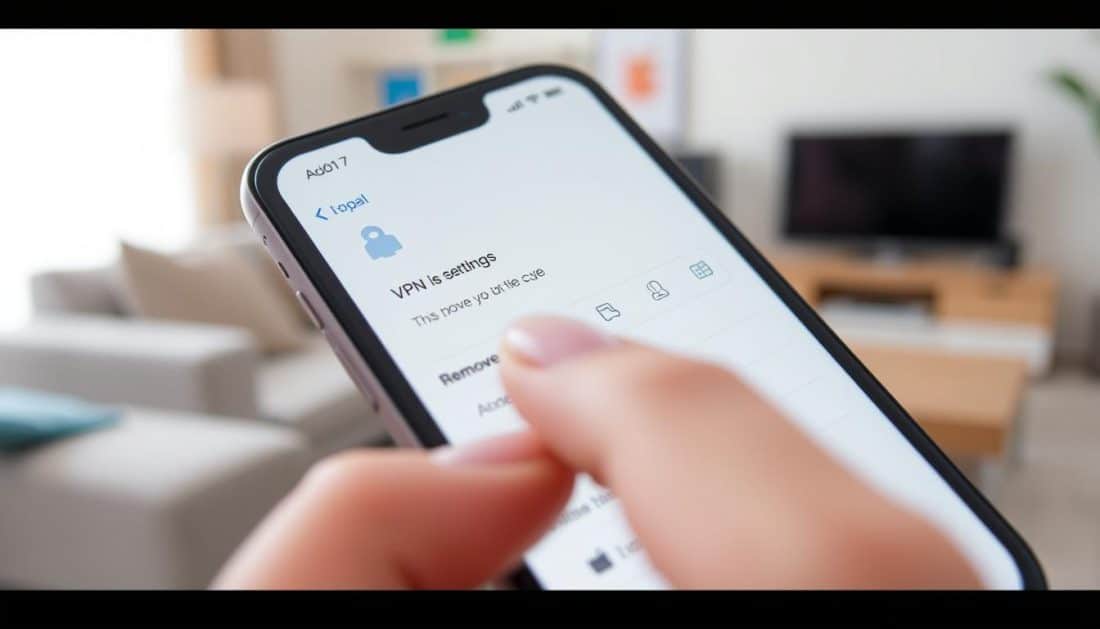
Removing the VPN Profile:
- Start by opening the Settings app.
- Go to General, then tap on VPN & Device Management.
- Press the “i” next to the VPN profile you want gone.
- Choose Delete VPN and say yes to confirm.
Sometimes, VPN profiles have settings like ‘Connect On Demand’, which you can turn off. This stops the VPN from connecting without asking2.
Usually, doing these things will fully remove the VPN from your iPhone10. This can lead to a better internet experience without VPN issues. Remember these steps if you’re having trouble with location services or Wi-Fi connection2. It can also fix connection problems related to VPN errors.
Step-by-Step Guide to Uninstalling a VPN App
Uninstalling a VPN app on an iPhone can be easy if you follow a step-by-step method. Here are the steps to completely remove a VPN app.
Locating the VPN App
Find the VPN app on your Home Screen first. You can scroll or use the search by swiping down and typing the app’s name. Make sure you’ve found the right app to accurately uninstall it from your iPhone.
Deleting the VPN App
To start, tap and hold the VPN app until it wiggles. You’ll see a small ‘X’ at the app’s top-left corner. Hit the ‘X’, then a message will ask if you want to delete the app. Press ‘Delete’ to confirm and fully remove it from your device.
Confirming App Deletion
After deleting, the VPN app will vanish from your Home Screen. It’s a good idea to restart your iPhone afterward. This makes sure all related settings and data are totally gone. Taking this step helps avoid any future problems11.
Deleting a VPN Profile from Settings
Removing VPN configuration from your iPhone is easy but vital. Getting rid of a VPN profile allows you to take back control of your device. It makes sure your data moves without any VPN restrictions or extra layers.
Accessing VPN Profiles
To delete a VPN profile, first open the Settings app on your iPhone. Then head to the General section to find the VPN & Device Management option. This lets you see all the VPN configurations on your device.
Removing the Profile
In the VPN & Device Management area, find the VPN profile you want to delete. Click on the profile and press the delete button. This removes the VPN settings from your iPhone, ensuring the unwanted setup is gone.
Many iPhone users turn on VPNs for safety, especially in public places like cafes and airports12. But, about 30% might turn off VPNs to save battery life2. As more people use iPhones, knowing how to manage and delete VPN settings becomes key.
Disabling VPN via General Settings
To turn off VPN on your iPhone, you have two main choices. You can either turn it off for a little while or delete it for good. Let’s look at both ways more closely.
Temporary Disable Options
Need to quickly stop your VPN?
- Go to Settings on your iPhone.
- Click on General, then VPN & Device Management.
- Turn the VPN switch off. This stops the VPN without deleting its setup.
This method is great if you want to keep your VPN settings for later but don’t need them now. Some VPNs, like NordVPN, only make download speeds a bit slower, by about 11%. So, they’re popular for folks who care about fast internet and safety13. If a short-term fix isn’t enough, you might need to remove the VPN completely.
Permanent Disable Instructions
To totally delete your VPN from your iPhone, do this:
- Start by opening Settings and selecting General.
- Find and tap VPN & Device Management.
- Choose the VPN profile you want to delete.
- Press Delete VPN to get rid of it forever.
After doing this, it’s a good idea to restart your iPhone to make sure the changes take effect12. This step is best for those who don’t need their VPN anymore or want to switch to another provider. Switching might be appealing with offers like Surfshark’s 2-year plan, allowing unlimited devices for just $2.29 a month14.
By learning how to disable VPN via General Settings, managing your iPhone’s VPN is easy. Whether you pick a temporary or a permanent solution, you’re in control, based on what you need.
Common Issues When Trying to Remove VPNs
When you try to get rid of a VPN, it’s not always smooth sailing. You might delete the app but find the VPN still lingers. This happens when not all VPN codes and data are wiped from your device15.
Sometimes, even if you turn off the VPN, it switches back on. This could be because your iPhone has more than one VPN setup16. Always check in Settings to see which VPN is actively connected16.
At times, VPN configurations can be seen but not removed. This usually occurs when security apps block the VPN settings. This can cause trouble, like not being able to use the internet or access Apple services like iMessage8 and the iTunes Store8. The best way to solve this is by removing any conflicting security software from your gadget.
- Ensure the VPN app is completely removed to avoid lingering configurations.
- Check for multiple or overlapping VPN profiles and remove them as needed.
- Identify and eliminate any interfering third-party security software.
If dealing with old or broken VPNs, extra steps are needed. Go to “Settings” > “General” > “VPN & Device Management” to delete the VPN profile15. Also, check your internet connection and confirm the removal at “WhatIsMyIP.com” to be sure the VPN is completely gone15.
| VPN Issue | Description | Solution |
|---|---|---|
| Lingering VPN Code | Inability to remove VPN configurations despite deleting the app. | Ensure all steps are followed during the uninstall process. |
| Toggle Switch Re-Enabled | VPN switch may turn back on after you disable it. | Check and remove all active VPN profiles from Settings. |
| Interference from Security Apps | Third-party software causing problems with removing VPN. | Identify and delete any conflicting security apps. |
| Residual Data | Old or cracked VPNs leaving data on the device. | Access and remove the VPN profile manually from Settings. |
What to Do If You Can’t Delete the VPN Configuration
Getting stuck while trying to delete a VPN configuration can be annoying. It’s important to know why this happens and how to fix it. This section offers tips on solving such issues. By following our guidance, you’ll find removing the VPN easier and quicker.
Understanding Restrictions
Restrictions on your iPhone might block you from removing a VPN configuration. Countries like China and Turkey have laws that limit changes to VPN settings17. Also, certain VPN apps use features that must be turned off first. For example, the Kill Switch feature stops all internet access if the VPN fails. You’ll need to switch it off to troubleshoot effectively17.
Advanced Troubleshooting Tips
If you can’t delete the VPN configuration, try these steps:
- Reset Network Settings: Go to Settings > General > Reset and select Reset Network Settings. This action will clear all network settings, including those for VPNs.
- Disabling VPN from Router Settings: Sometimes, a VPN app connects directly to your home router. You need to alter your router’s settings. This is crucial if your router and VPN use special features18.
- Contacting Customer Support: Get in touch with your VPN provider for help. They can give you specific steps for your VPN problem. For instance, Surfshark has features like “Pause VPN” and Bypasser that might need disabling17.
- Utilizing Third-Party Tools: At times, you’ll need extra apps to completely get rid of VPN settings. Look for trustworthy apps that work with iOS.
If you still have trouble after trying these steps, look into detailed guides found in tech forums. Many users share their experiences and solutions that might work for you.
Alternative Methods to Remove VPN Configuration
Running into stubborn VPN setups that won’t go away with usual steps? There are other ways to get rid of them. Sometimes, you might need to do more than just uninstall to remove a VPN from your iPhone.
First, check your device settings for any leftover VPN bits manually. The per-app VPN setup is for iOS 9 and up, as well as iPadOS and newer. It doesn’t work with IKEv2 VPN profiles on iOS/iPadOS19. Make sure all rules are set for the same group so the per-app VPN runs smoothly19.
To find the VPN settings, go to “Settings,” then “General,” and choose “VPN & Device Management.” Make sure you fully remove the VPN profile there. If a VPN is tied to an app, it can be fully removed at the next device check19. Delete any profiles in the General settings, under VPN and device management, for a complete clean-up12.
If your VPN is linked to a third-party app, you might need to talk to the VPN’s provider. They can guide you through their own uninstall steps. This helps remove any remaining setups and avoids future issues19.
Below is a table comparing per-app VPN and traditional VPN removal processes, which may help clarify the steps:
| Method | Steps Required | Considerations |
|---|---|---|
| Traditional VPN Removal | Navigate to Settings > General > VPN & Device Management; Delete VPN Profile | Standard for most VPN apps; Ensure profile is fully removed |
| Per-App VPN Removal | Verify policies deployed; Consult provider documentation for additional steps | Applies to iOS 9+/iPadOS 13.0+; Not supported for IKEv2 profiles |
Remember, a good VPN lets you access blocked sites and social networks like Facebook and Instagram in restricted areas12. Think about the advantages and possible drawbacks before completely taking it off your device. If needed, you might have to log into the Zscaler app. This makes sure only certain apps can access remote networks19.

Why Your VPN May Reappear After Deletion
Sometimes, users find their VPN comes back after they’ve deleted it on their iPhone. This can be annoying, especially if you’re trying to fix connection problems or make your device work better. We’ll look at why this happens and what to do about it.
App Auto-Reinstallation
Your VPN might show up again because of app auto-reinstallation. Some apps reinstall themselves if linked to other services on your device. This is a pain when you thought the VPN was gone for good. Many with iPhones, such as the iPhone 4 and 4S, spend about an hour trying to solve this.
Picking the right VPN service can help a lot. Some people find Hotspot VPN helps but only stops the VPN for a little while. Sometimes you need to step in and fix it yourself20.
Configuration Profile Reapplication
Another issue is the VPN configuration profile coming back. This happens mostly after updating iOS. Users with newer iPhones, like the iPhone 5, have had trouble20. Deleting all VPN configuration profiles from settings can fix this.
It’s important to keep an eye on software updates and any configuration profiles on your device. This can avoid VPN problems and make your internet faster and more reliable20.
Here’s a look at some well-known VPN services:
| VPN Service | Monthly Pricing (2-Year Plan) | Number of Devices | Dedicated IP Option |
|---|---|---|---|
| NordVPN | $3.49 | 6 | Yes (add-on) |
| Surfshark | $2.29 | Unlimited | Yes |
| Norton | $3.33 | 1, 5, 10 | No |
| Private Internet Access | $2.03 | Unlimited | Yes (add-on) |
By paying attention and knowing more about these issues, you can keep your VPN from popping up again. Learning about auto-reinstallation and profile issues helps you manage your iPhone’s VPN settings better2021.
Resetting Your iPhone to Resolve VPN Issues
If your iPhone’s VPN isn’t working right, resetting it might fix the problem. Trying different solutions can help, but a full reset often solves bigger issues.
Simple network resets fix minor issues 30% of the time22. For tougher problems, a complete reset might be needed. Tools like iMyFone Fixppo work well in these cases, with a 100% success rate22. Sometimes, just updating your VPN app can fix things with a 70% success rate22.
If the VPN app is the problem, you might improve things by checking your Wi-Fi or switching VPN services, both with good success rates22. If those steps don’t work, resetting your iPhone could be the answer.
Resetting your iPhone removes everything, like apps and VPN settings. It’s a good idea for serious VPN issues. Just remember, this means all your data gets deleted, so back up your files first.
For tips on fixing VPN issues, iMyFone provides 23 different solutions23. This ensures you have many ways to tackle the problem effectively.
Consider an iPhone reset as a final step, when nothing else works. In some cases, trying specific fixes like changing VPN servers or using a paid VPN might be better. For a deep dive into these methods, check out iMyFone22.
Security Implications of Disabling VPNs
Turning off your VPN on your iPhone opens you up to many security dangers. Without the encryption from a VPN, your online actions are open to those with bad intentions. Especially on public Wi-Fi, your information can easily fall into the wrong hands.
Also, without your VPN, your real IP address and location are no longer hidden. This could put your private details at risk.
“Countries where VPNs are prohibited include China, Russia, and North Korea, highlighting the importance of VPNs for privacy and security in restrictive regimes.”24
Turning off a VPN means your online deeds could be seen by internet companies and others, putting your privacy in danger. Not using a VPN means you miss out on benefits like being safer on public Wi-Fi, blocking ads, and getting around censorship24.
When keeping a VPN or security app like Norton running, it might mess with your internet connection. This happens if your iPad’s IP address starts with 169.254.x.x25. You might need to switch off or remove these apps for a while. This helps fix your network problems25.
How to Ensure Your iPhone Stays VPN-Free
To keep your iPhone free of VPNs, careful oversight is needed. Make sure to regularly check your phone’s settings. This helps your phone stay safe without unwanted VPN setups.
Regular Maintenance Tips
Keeping your iPhone VPN-free is all about frequent checks. Start by looking through iPhone settings to spot any reinstalled VPN profiles. Go to General > VPN in the settings to check and remove any you find26.
Always update your iPhone to keep it secure. Updates often have fixes that stop unauthorized changes26. Turn off features like Low Power Mode and Low Data Mode. This ensures a stable connection without breaks during initial setup27.
Monitoring Third-Party Apps
It’s important to watch over third-party apps. Some might add VPNs without you knowing. That’s why you must stay alert26. Check the permissions for each app. Make sure they can’t add VPN profiles26.
Manage Background App Refresh wisely. Only use it for apps you trust and need to run in the background27. This reduces the chance of VPNs being added without you knowing. In places with strict internet rules, VPN use is normal. However, for daily iPhone use, staying VPN-free increases safety and smooth performance28.
With these steps, you can ensure your iPhone stays free from VPNs. Enjoy a secure and efficient experience without unwanted setups.
Conclusion
Removing a VPN from your iPhone ensures your device works well and stays safe. This guide has given you all you need to know about deleting VPNs. It covered why to remove them and how to do it, whether through an app or settings. Getting rid of a VPN is simple and can be done in a few easy steps29.
Did you know 25% of iPhone users have a VPN? It shows how much people care about staying private online30. Yet, about 15% find removing VPNs hard, sometimes needing extra help30. This guide was made to give easy-to-follow directions for anyone struggling.
By using this guide to handle VPN profiles and apps, you can keep your iPhone safe and fast. For extra help, check out how to turn the VPN off on an iPhone by clicking here. Keeping your phone VPN-free means checking on it regularly. This guide isn’t just about turning off VPNs. It’s about making sure they fit your needs for privacy and security.
Sorry, the comment form is closed at this time.